
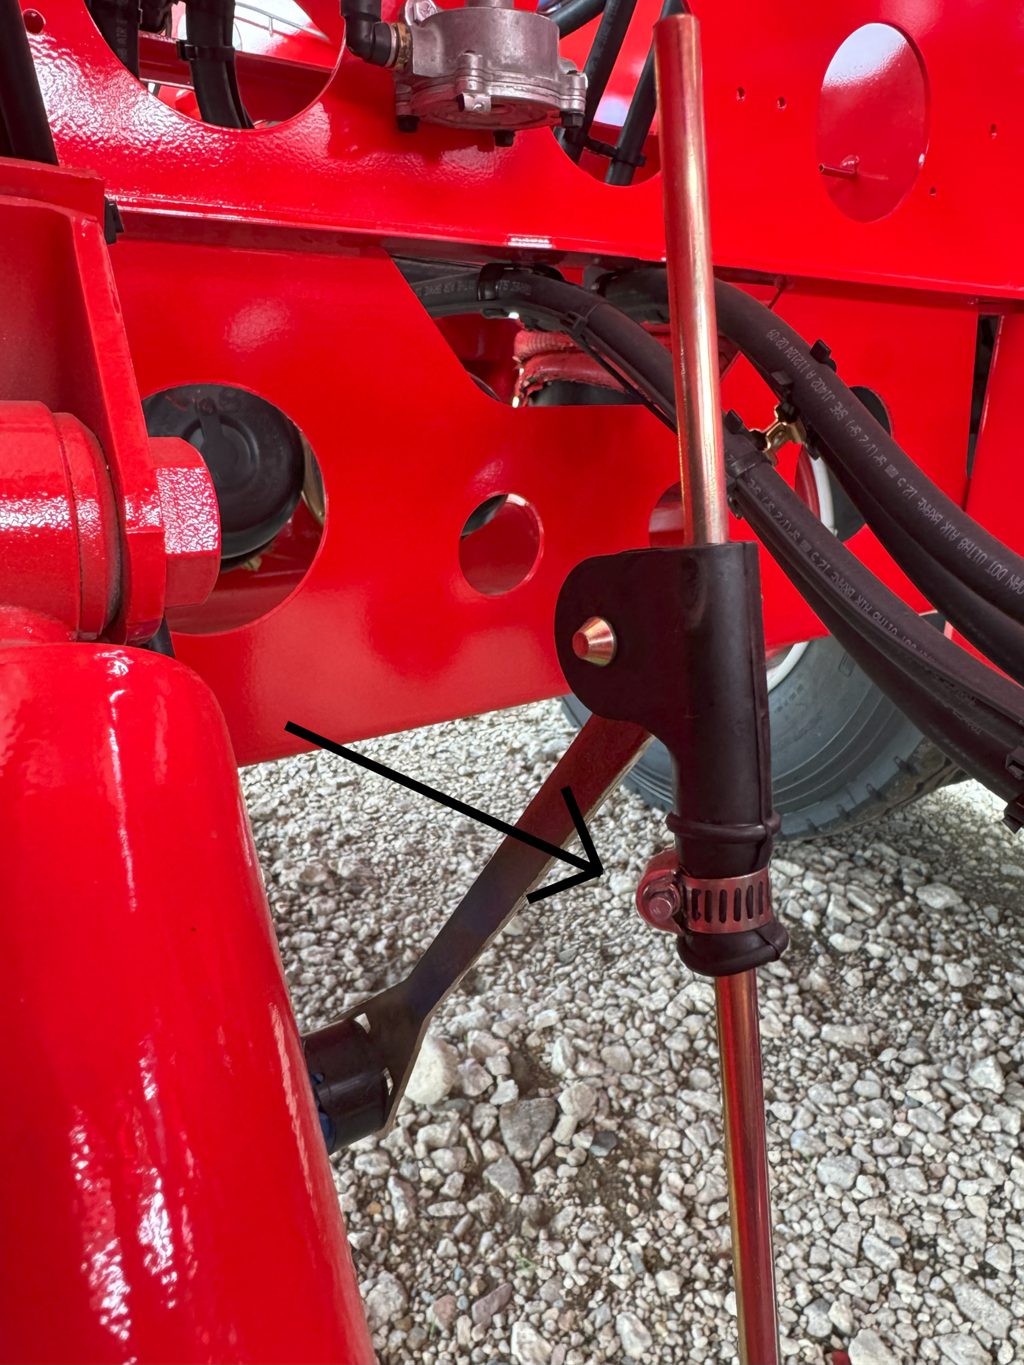
STEP 1: Loosen the hose clamp on the level ride valve
Using the flathead screwdriver, loosen the screw on the hose clamp closest to the exterior of the trailer, or road side of the trailer. Once it is loosened, you should be able to move rod up and down inside the rubber boot.
STEP 2: Calculate the distance needed between the axle and frame for your trailer
The distance needed between the frame and center of the axle may vary for each trailer. If you are unsure of what your ride height should be, please reach out to the SmithCo team for verification.
To calculate the distance:
Ride Height = Distance from center of axle to the bottom of the frame flange
Example: 17” Ride Height would be 17” from center of axle to bottom of frame rail
*To get distance required from top of the axle to bottom of frame rail divide the axle diameter by 2 and subtract that number from the required ride height.
Example: 5” axle / 2 = 2.5”
Distance needed = 17”
17”- 2.5” = 14.5” needed from bottom of frame to top of axle
STEP 3: Adjust the height by moving the rod up or down in the boot
Note: Moving the boot up the rod will raise the height and down will lower the height.
Measure from top of axle to bottom of the frame to determine what the current distance is. Slide the rod in the boot up or down until you reach your necessary distance.
*It is helpful to have two people during this step – one to hold the tape measure while another moves the clamp.
STEP 4: Tighten the clamp screw
Once you have reached your proper ride height, tighten the screw on the hose clamp using your flathead screwdriver. Ensure that the nut on the hose clamp will not interfere with the rod.
STEP 5: Dump air out of suspension and raise trailer
Dump all the air out of the suspension before raising it back up again. Once you have the trailer aired back up, measure the distance once more to double check your ride height.
You are now ready to use your side dump.